
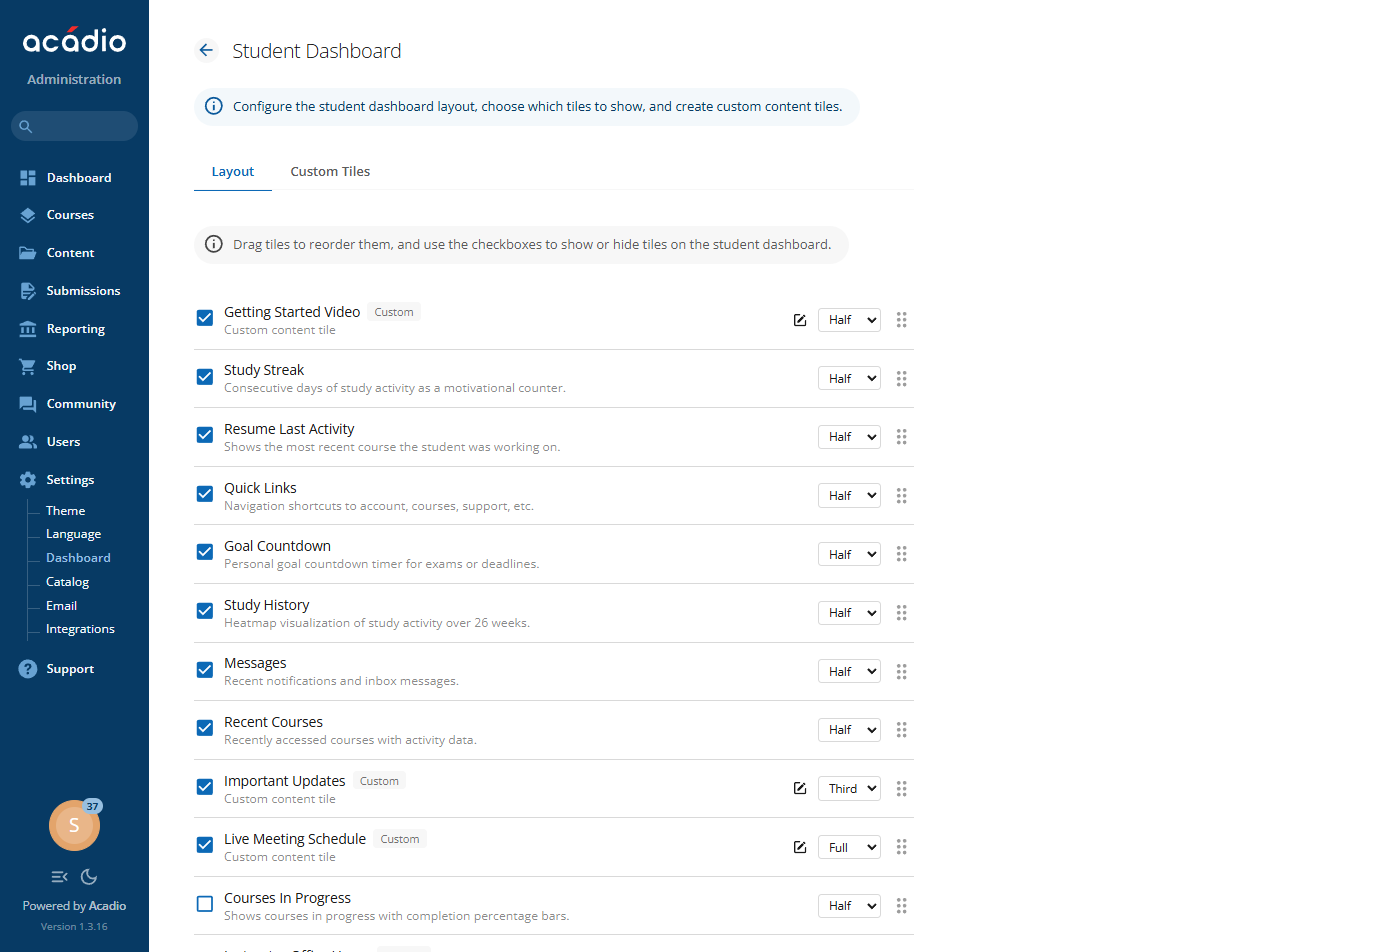
The appearance of the Student Dashboard can be customized by navigating to Settings > Student Dashboard from the main menu.
Use the Layout list to show or hide tiles using the checkboxes, or drag them into your preferred order using the grip dots on the right side of each item. You can also adjust the width of each tile using the dropdown menu, choosing Full Width, Half Width, or One-Third Width.
A live preview of the dashboard appears below the list and updates automatically as you make changes.
Creating a Custom Tile
Follow the steps below to create a new tile:
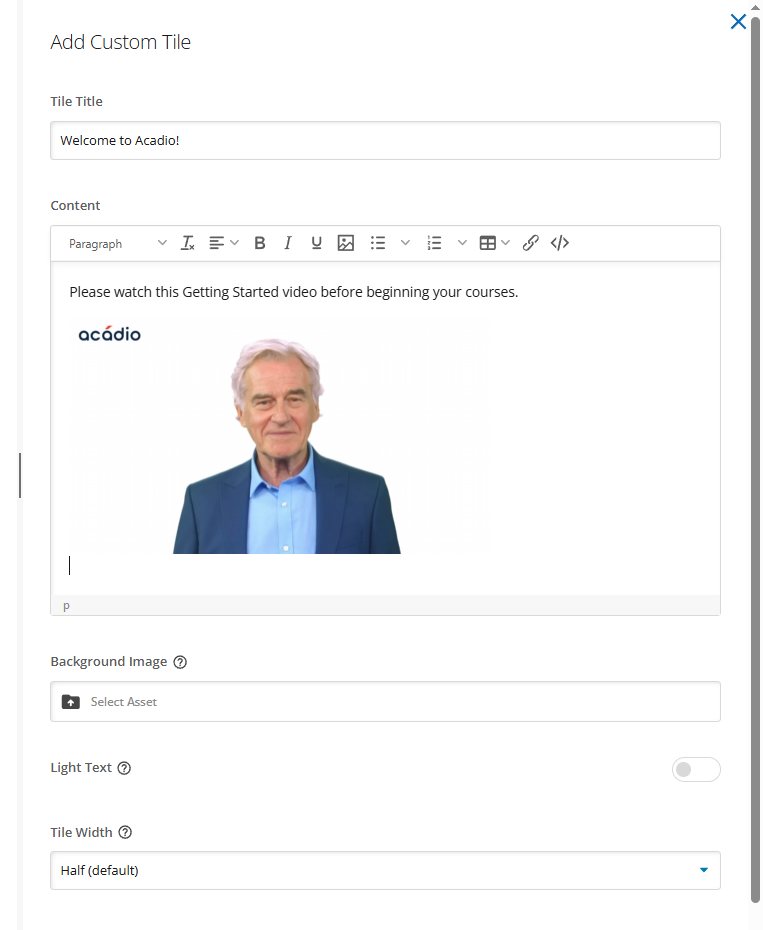
Select the Custom Tiles tab at the top of the page, then click Add Custom Tile to open the configuration drawer
Enter a title for the tile and add your content using the WYSIWYG editor. You can insert images, video, audio, HTML embeds (via code assets), and more.
IMPORTANT: After inserting the video, click the </> button in the toolbar. In the video’s style attribute, setwidth: 100%;to ensure the video scales to and respects the width of the tile.Optionally, choose a background image and enable the Light Text toggle to improve readability when using darker backgrounds.
Finally, select the desired tile width and click Save.
You can now adjust the position of your new tile from the Layout tab. After making changes, log in to the student portal to confirm the Dashboard appears as intended.